TAG BRUSH

For this project, I used Photoshop to create a Tag Brush out of the logo I created in Illustrator. Since this project was the first one I did in Photoshop, I had a hard time with it. I think Photoshop is a little complicated to use because you got to pay attention to many small details and there is a lot of tools. However, the tutorial the Professor shared with us really helped me.
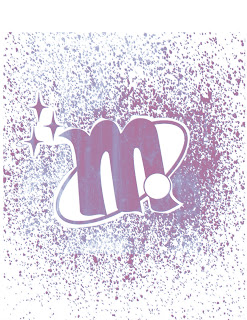
First, I placed embedded my logo in the canvas so it wouldn't move when I was adding the other things. I used the Polygonal Lasso Tool to draw a polygonal selection of the outer area surrounding my logo. Then, I created a new layer and used the Soft Brush Tool to paint some light strokes on the inside edge of the selection. I also used the Paths Palette to Make Work Path and then I made the selection. After all of this, I inserted the spray.tif, scratches.tif, and negative.tif files on Drop Box to add to the background and give that "brush" look. For the scratches and negative files, I used the Layer Blending Modes to lighten the image to make it negative. I also turned down the opacity on them so it wouldn't be too visible.
I chose a purple color first, and then on top of it I put a blue color to give it a kind of 3D look. In the end, I really liked how my brush turned out and I'm happy with the final look.

Comments
Post a Comment